Google analytics with Reach router in 5 steps

Aman has been a serial tech entrepreneur with 3 startup, most recently cofounding twimbit as the CTO. He has been a former ML researcher at TU Vienna Informatics, UX / AI lead at upsell.ai and founder lead at Mobile-web.dev . He is an active member of web and web3 community while he have delivered 40+ tech talks, shared advice on product building and mentored hundred of kids in tech and entrepreneurship. He has been featured as top CTO of India and recognised among world most influential tech business leaders.
Analytics is very important to track the performance of your web app. In a single page application, you would like to see the changing URL in Google Analytics Dashboard but as the page path changes, it doesn’t loads and sends the data automatically. Hence Just including the Google Analytics script tag won’t work. In this guide, I would take you through each step that you need in order to set up Google analytics with reach router that sends real-time data on each page change.
Reach router is a small, simple router for React that borrows from React Router, Ember, and Preact Router. Reach Router has a small footprint, supports only simple route patterns by design, and has strong (but experimental) accessibility features.
In this guide, we will use React-ga that handles the Google Analytics tag and sends that data whenever there is a URL change by listening to the route changes.
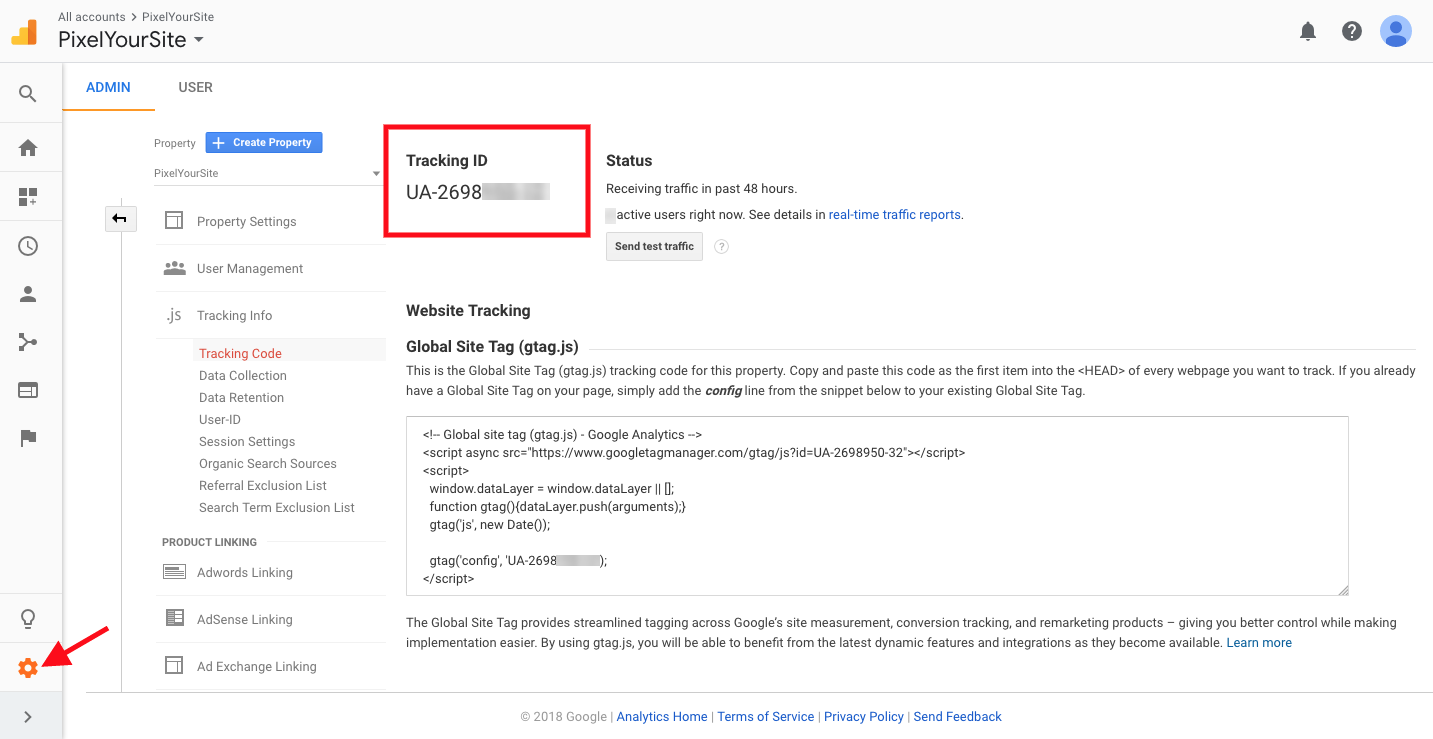
Step 1: Setup Google Analytics Property
We will first create a Google Analytics property and obtain the tracking ID
Step 2: Install React GA
React GA is a JavaScript module that can be used to include Google Analytics tracking code in a website or app that uses React for its front-end codebase.
Installation using npm:
npm install react-ga --save
Step 3: Import required modules
Now we would need to import the following modules from the Reach Router and the react-ga library in our App.js
import { Router,createHistory,LocationProvider }from "@reach/router";
import ReactGA from "react-ga";
Step 4: Setup tracking Code
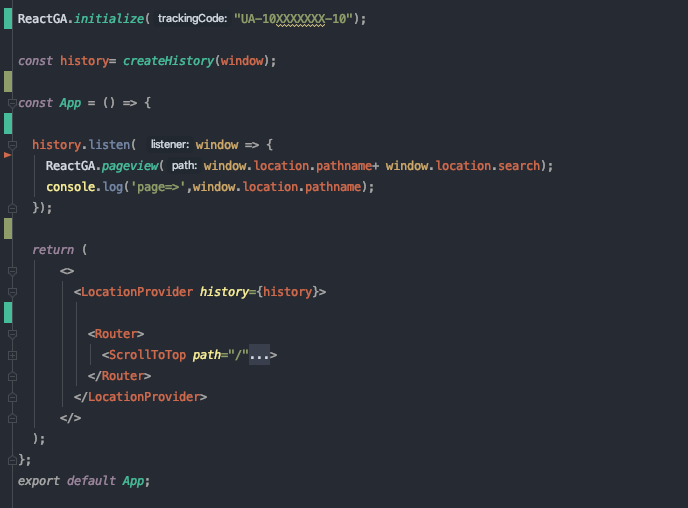
Initialize Google Analytics with the obtained tracking ID in the first step in the global scope just after the export in App.js . Also, declare const history globally that enables you to record the browser history. We will use the constant later.
ReactGA.*initialize*("UA-103xxxxx-xx");
*const *history= *createHistory*(window);
Step 5: Handle the Routes
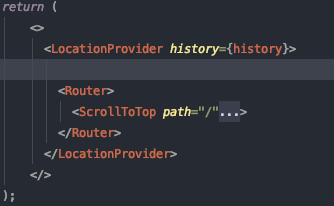
Now declare in return statement of your const App ifi function in App.js so that all components are inside it. This will help us listen to the URL’s as the route changes.
Step 6: Send the Tracking Data
Now on every URL change using history.listen, we will trigger and send the data using ReactGA.pageview. For this, we will setup a function that listen to the history object and changes the value of ReactGA.pageview object inside the const APP ifi function in our app.js
history.listen( window => {
  ReactGA.*pageview*(window.location.pathname+ window.location.search);
  console.log('page=>',window.location.pathname);
});
Here window.location.pathname is the URL and window.location.search are the URL Params.
Your dinal setup in App.js should look something like this
Run your code and you should be able to see the changes live in google analytics dashboard as you change the path.
Bonus Step: Sending Aditional Info
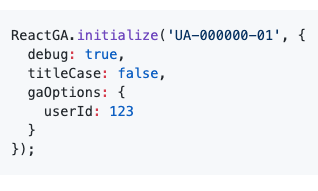
You can also send additional information using React.GA such as user ID, demographic, preference and other additional information and even on certain triggers using the same approach. react-ga/react-ga React Google Analytics Module. Contribute to react-ga/react-ga development by creating an account on GitHub.github.com